Sunday, January 8, 2012

Dinosaurs and Dragons

I have known my friend Hillary since the fifth grade.  She has been best friends with my older sister for about the same amount of time.  Her son Noah turned three in December and she asked me to make the cake for his party.  (I mentioned him in my New Year's post - he's a big fan of cake.)  Noah loves dinosaurs.  In fact, I have never seen so many dinosaurs in one place than at his birthday party.  And Noah wanted a dinosaur cake.

I got the idea from Sweet Dreams by Tracy, found on Pinterest - a website that is becoming extremely popular and thoroughly confuses me.  I thought the design looked a tad more like a dragon than a dinosaur.  But then I was informed by my siblings that dragons and dinosaurs are the same thing.  So as long as the cake looks cool . . . . .

(Author's Note - a reader pointed out that Sweet Dreams is no longer in existence, so here are a few links to other tutorials if you aren't happy with mine.  3d Dino Cake3d Dino Cake Video)

I started with some butter fudge Duncan Hines cake mix.  I'm not a huge fan of the butter mixes.  They just end up being a huge pain.  For example, they get all big and puffy, overflow the pan and then when they cool, they sink back down again.  Just a tad bit frustrating.  But it worked.

I used one six-inch, one eight-inch and one 9-inch round pan to make the body of the cake. (Yay Christmas presents for making this cake possible!)

I torted the 9-inch and filled it with one of my most popular fillings - hot fudge topping with chocolate chips.

Yummy filling.  You always want your dam to be the
same color icing as you are going to put on the outside of the cake.
(A little shout out to Pastor Dave who happened to be around and
opened the fudge topping jar for me.  Greasy hands you see . . .)
Then I cut the 9-inch and the 6-inch in half.  I added filling on the 6-inch halves and stuck them onto the sides of the 9-inch halves (also stuck together with filling).

Building the body
Then I cut the rest of the pieces from the 8-inch cake, adding a tail, neck and head.  I stuck the pieces on with icing.  My cake board was a little too small, but I managed to squeeze it all in.

Ready to be iced.
Dino head.
The neck and body.


Building a cake like this is really hard.  You get a lot of crumbs - which makes it hard to ice.  Plus you have to be sort of a sculptor - carving pieces so they will fit together and look they way you want it to.  But it can look great.

The tail

I was a little nervous that the cake halves
would not stay balanced on their side - but they did.
Next I frosted the entire cake with green frosting.  I believe I made 2 1/2 batches of frosting for this bad boy.  That's a looooooot of powdered sugar.


This was a little frustrating as well.  The crumbs kept mixing with the frosting and there were some very hard places to reach because of the way I built the cake.  In the end, I just decided that he would be a dirty dino. More realistic that way.


Once that was done, the real fun began.  I started adding the embellishments.  First came the eyes and nostrils.

I used tip 12 to create the nostrils and the green part around the eyes.  Then I used white frosting with tip 12 to make those lovely white eyeballs.  Add a dollop of black color to the eyeballs and there you have it.

Next came the legs.  Again using tip 12, I made front and back legs, along with some little green "fingers" with tip 3.  I finished the look with tip 3 yellow nails.


I also added some tip 3 teeth and little yellow spikes behind the eyes and at the end of the tail.

It kind of looks like he's grinning - totally unintentional, but I like it.

Back to tip 12 - I added some green spikes down the dino's neck, back and tail.

He's starting to look pretty awesome!
The last part was to add the red spikes.  I made these earlier in the day while the cakes were baking.  I melted some red Wilton candy melts in the microwave.  Then I put the resulting mess into a plastic sandwich bag and cut off the corner.  Next I outlined some triangles on parchment paper and filled them in with the candy.  I made 4 different sizes.  Finally I let them dry for the rest of the day before putting them on the cake.  (Sometimes when I use this method, I'll stick the candy in the freezer to harden.  The only problem with that is that it tends to start to melt when you take it out.  But if you need it to harden quickly, the freezer it is.)

You might notice that the cake is sitting on my ever faithful turntable.  I love that thing.
I thought the red spikes really made the cake.


Finally I piped the words on the cake board with tip 3.  And the cake was all ready to go!
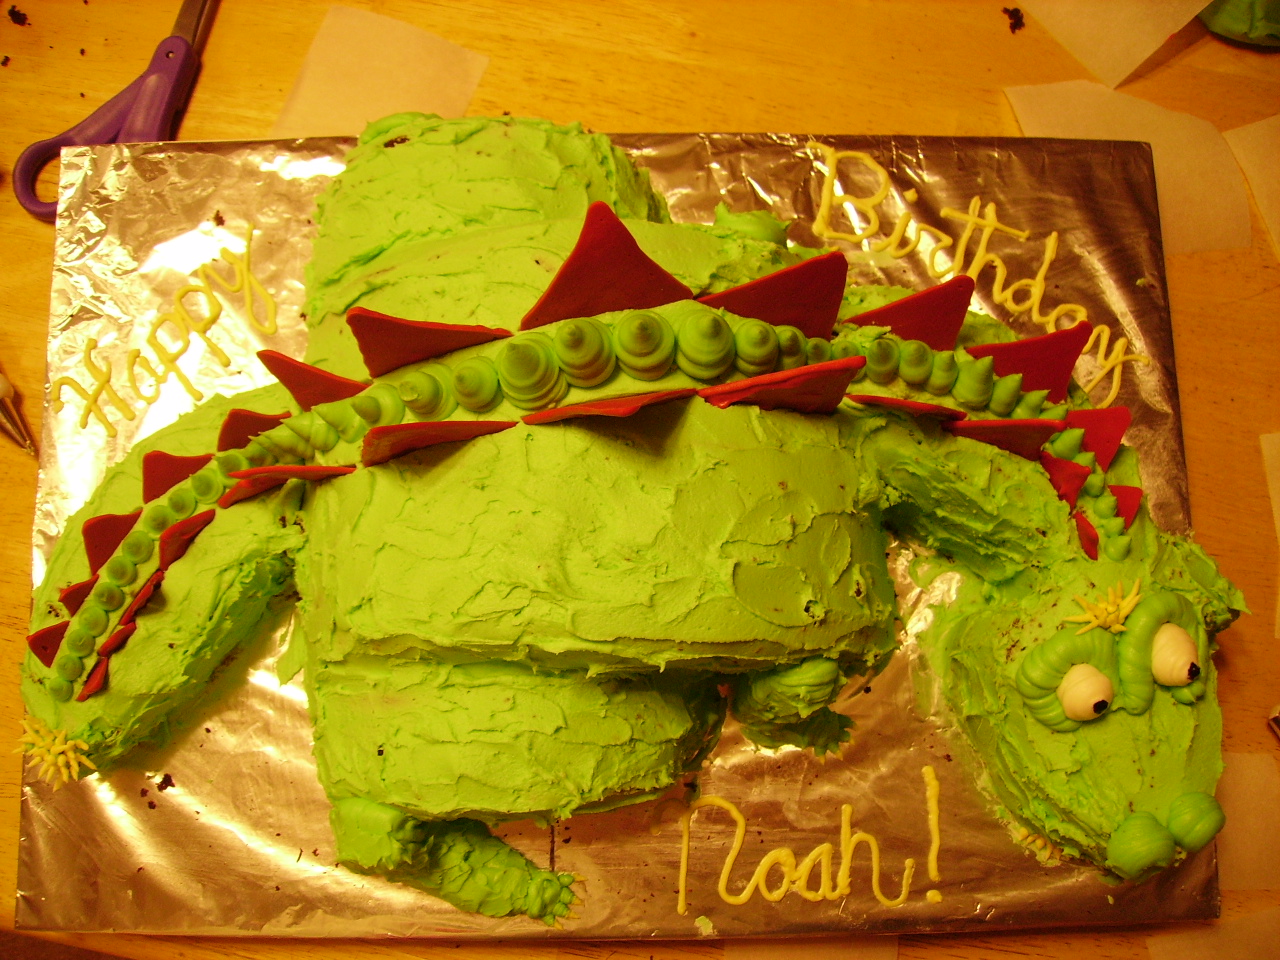


Happy birthday Noah! - love, the Smiling Dino.

Tuesday, January 3, 2012

Lesson Five: Fun with Fondant Flowers

Tuesday I started my second Wilton class.  I wasn't really keen on going.  It was very cold outside and so nice and cozy in my bed.  But I managed to bundle myself up, brave the chill and get myself to class.  I was the first one there besides Mary, the teacher.  She was very glad that I signed up for class 2.  She told me how great I was doing and how impressed she was with my buttercream flowers, etc.  She was almost shocked when I admitted that I did not sign up for class 3.  I don't know if she's trying really hard to sell the class or if she really wants me to be in it.

The same two women from class one are in my new class.  Of course the chocolate franchise owner once again did not read her supply list and hadn't brought anything with her that she needed except the class 2 kit.    And both of them forgot to bring fondant - the key ingredient for this session!  Good thing Michaels sells it  . . .

There were two newcomers as well - two middle-aged women.  I liked them; they were funny and everything was just amazing to them.  They are simultaneously taking class one and two, so they are there from 11-3 pm.  Now that's dedication.

For this lesson, we were learning to play with fondant.  Now I've used fondant before - it usually looks nice and tastes horrible.  Once upon a time I made my own fondant.  I think I was on a "I can make all this stuff on my own and it will be much better" sort of kick.  Yeah.  Who knew you could buy glucose and glycerin in a bottle?  And who knew they would be so hard to use?

Made with my own homemade fondant.  First and last attempt.
Now I just buy my fondant at Michaels.  I generally try not to use it all that much, if possible.  But it can be nice for embellishments.  For our lesson, we made button flowers and pansies.  I got to use my first fondant press.  It's kind of like a cookie cutter with two pieces, and it's kind of fun to use.  It felt like we were playing with Play-doh.  I mean, that's basically what fondant is - edible Play-doh.  You roll it out ("not like a pie crust!" exclaims Mary), put it in the cutter and presto!  Pieces for your flower.

Ideally the lines and dots are supposed to be imprinted on your fondant.
This effect is harder to achieve than it looks.
Once the pieces dry, you glue them together using gum glue.  Which does not involve gum or actual glue.  It's just water with a little dissolved fondant in it.  Use sparingly.

Aww, so cute!  A whimsical flower.
The pansy was a more realistic flower and slightly more complicated.  There was a lot of rolling, pulling and dusting involved.  We used the pansy cutter and then rolled the petals thinly to get them to look like this:


Then we rolled single petals to stick in the middle.  A little glue, a bit of paper towel to help it dry standing up, a little rounded stamen and voila!  (I'm just realizing I say that a lot.)


And the best thing about fondant flowers?  They last for a really really really long time.  So if I ever wanted to make a flowery cake, like say, someone's wedding cake, I could make all the flowers in advance.  Way in advance.

Hallelujah.

Monday, January 2, 2012

New Year's Eve

New Year's Eve is a hard holiday for cake.  I mean, what do you associate with NYE?  Fireworks?  The dropping ball?  Sparkling grape juice?  (My sister would probably love a sparkling grape juice bottle cake.  Maybe next year)  It simply isn't conducive to cool cakes.  I made this one a few years ago using modeling chocolate:

Yes, I am aware it is not accurate.  Sorry.
Last year I got around the NYE theme problem by making a cake for a "Beat the Post Holiday Blues" party instead of a NYE party.  Hence the wintery theme.
Credit goes to my brother-in-law Aaron for finding this recipe.
That igloo cake is pretty sweet.  I was racking my brain, trying to figure out how to top that when I realized that my Hello Cupcake book was not packed away on the patio with the rest of my stuff.  It was sitting on my one bookshelf in my room (the other four currently being stored away).
Hello Cupcake
What I like about Ms. Tack and Mr. Richardson is that they are not afraid to use other edible goodies besides buttercream, fondant and other types of icing.  Candy is one of their favorite tools - especially since it can be manipulated to look like so many different things.  They are all about making awesome cupcakes without having all the decorating tools that Wilton wants you to have to purchase.

But since I have a lot of those tools anyway, I used them.  So I picked a cute, simple design (my mother says I never do anything simple) and went with it - even though it had nothing to do with winter or NYE.  Hello sunflowers!


I made devil's food cupcakes and covered them with green frosting.  Next I got out some chocolate cremes (Jewel brand oreos) and some mini oreos.  Using my favorite tip (oh yeah, the leaf tip!), I added some petals on the top and bottom parts of the cookie.  The petals were supposed to be orange and yellow together.  But the frosting kept coming out only orange and then only yellow.  But I think the mixture turned out okay.


Some had three mini oreos!

The recipe said to use candy for the leaves.  But you know me and leaves.  So I decided to just pipe them using buttercream and my ever faithful leaf tip.  The ladybugs were the final touch.

Big, fat leaves.  Well, maybe not so fat.
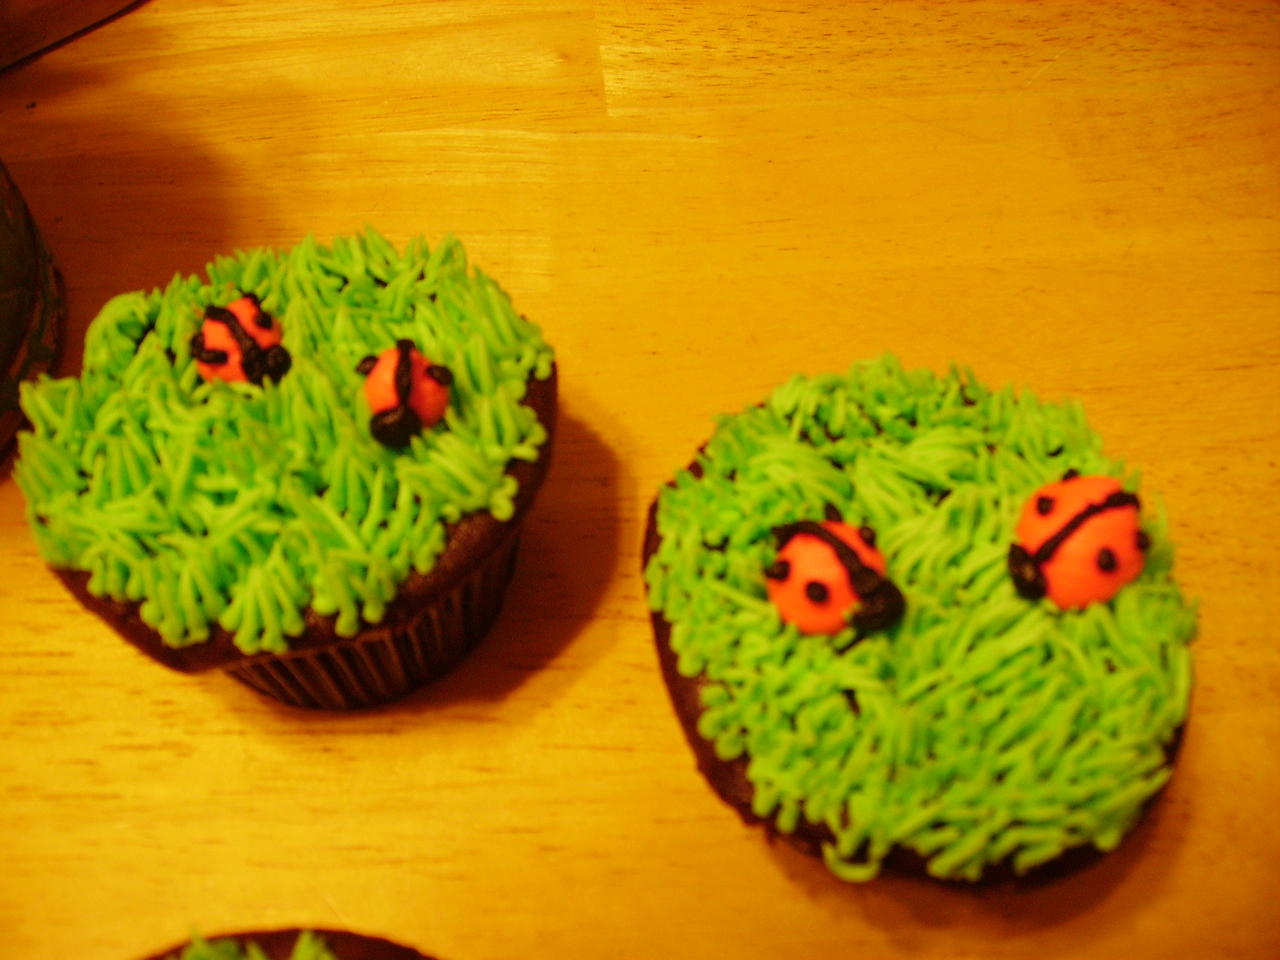
I also made a few cupcakes with just grass and ladybugs.


The grass tip is another one of my favorites.  It just looks so cool.  Like grass!  I was worried about the ladybugs because it is really really really hard to get red frosting.  It always just ends up looking pink.  So how does one ever achieve red frosting, you might ask?  One buys it at the store.

As I kept adding more and more food coloring into the frosting, I was mentally kicking myself for not just buying some.  The color you see is supposed to be Christmas Red.  Right.  More like hot pink.  

As I was working on them, my friend's son, Noah, entered the room.  Noah loves to look at my cakes.  He also loves taste-testing by sticking his finger in the cake (he's three).  But he saw me working on the cupcakes and exclaimed, "It's a ladybug!"  I was so happy I wanted to hug him!  If a three-year-old (albeit a smart one) could tell it was a ladybug, then I guess I did alright.


Now my mother was concerned that I wasn't going to finish the cupcakes in time for the party.  I don't know why she was so worried.  I mean - I was just making these simple cupcakes.  Piece of cake!  But, since my mother is usually very wise, I decided to finish up the cupcakes quickly with some quirky designs of my own.


 See what fun you can have with a little frosting and some decorating tips?

Well I think everyone enjoyed the cupcakes and thought they looked cool.  My nephew immediately claimed one of the grass cupcakes with two ladybugs.  No one seemed to notice the lack of a NYE theme.  Whew.

And so I leave you with this last picture, which I think is kind of cool:


Happy New Year!!!