I used to not really like cheesecake.
Then I met my husband.
He doesn't like super sweet desserts, so cheesecake is right up his alley. The first cheesecake I ever made was for his birthday a couple years ago. And I was hooked.
Since then, I've been experimenting with different flavors. (the cranberry Christmas cheesecake was the favorite so far).
This year for his birthday, I tried a turtle cheesecake. But none of the recipes I found were quite what i was looking for, so I ended up combining about four different recipes to create this masterpiece.
Now my husband always gets frustrated when he clicks on a link for a recipe and then has to read through endless "cutsey" text and anecdotes before he can get to the actual recipe. So in honor of him, I am posting the recipe first. (Love you, honey!) If you like the tips, photos, and anecdotes, keep reading.
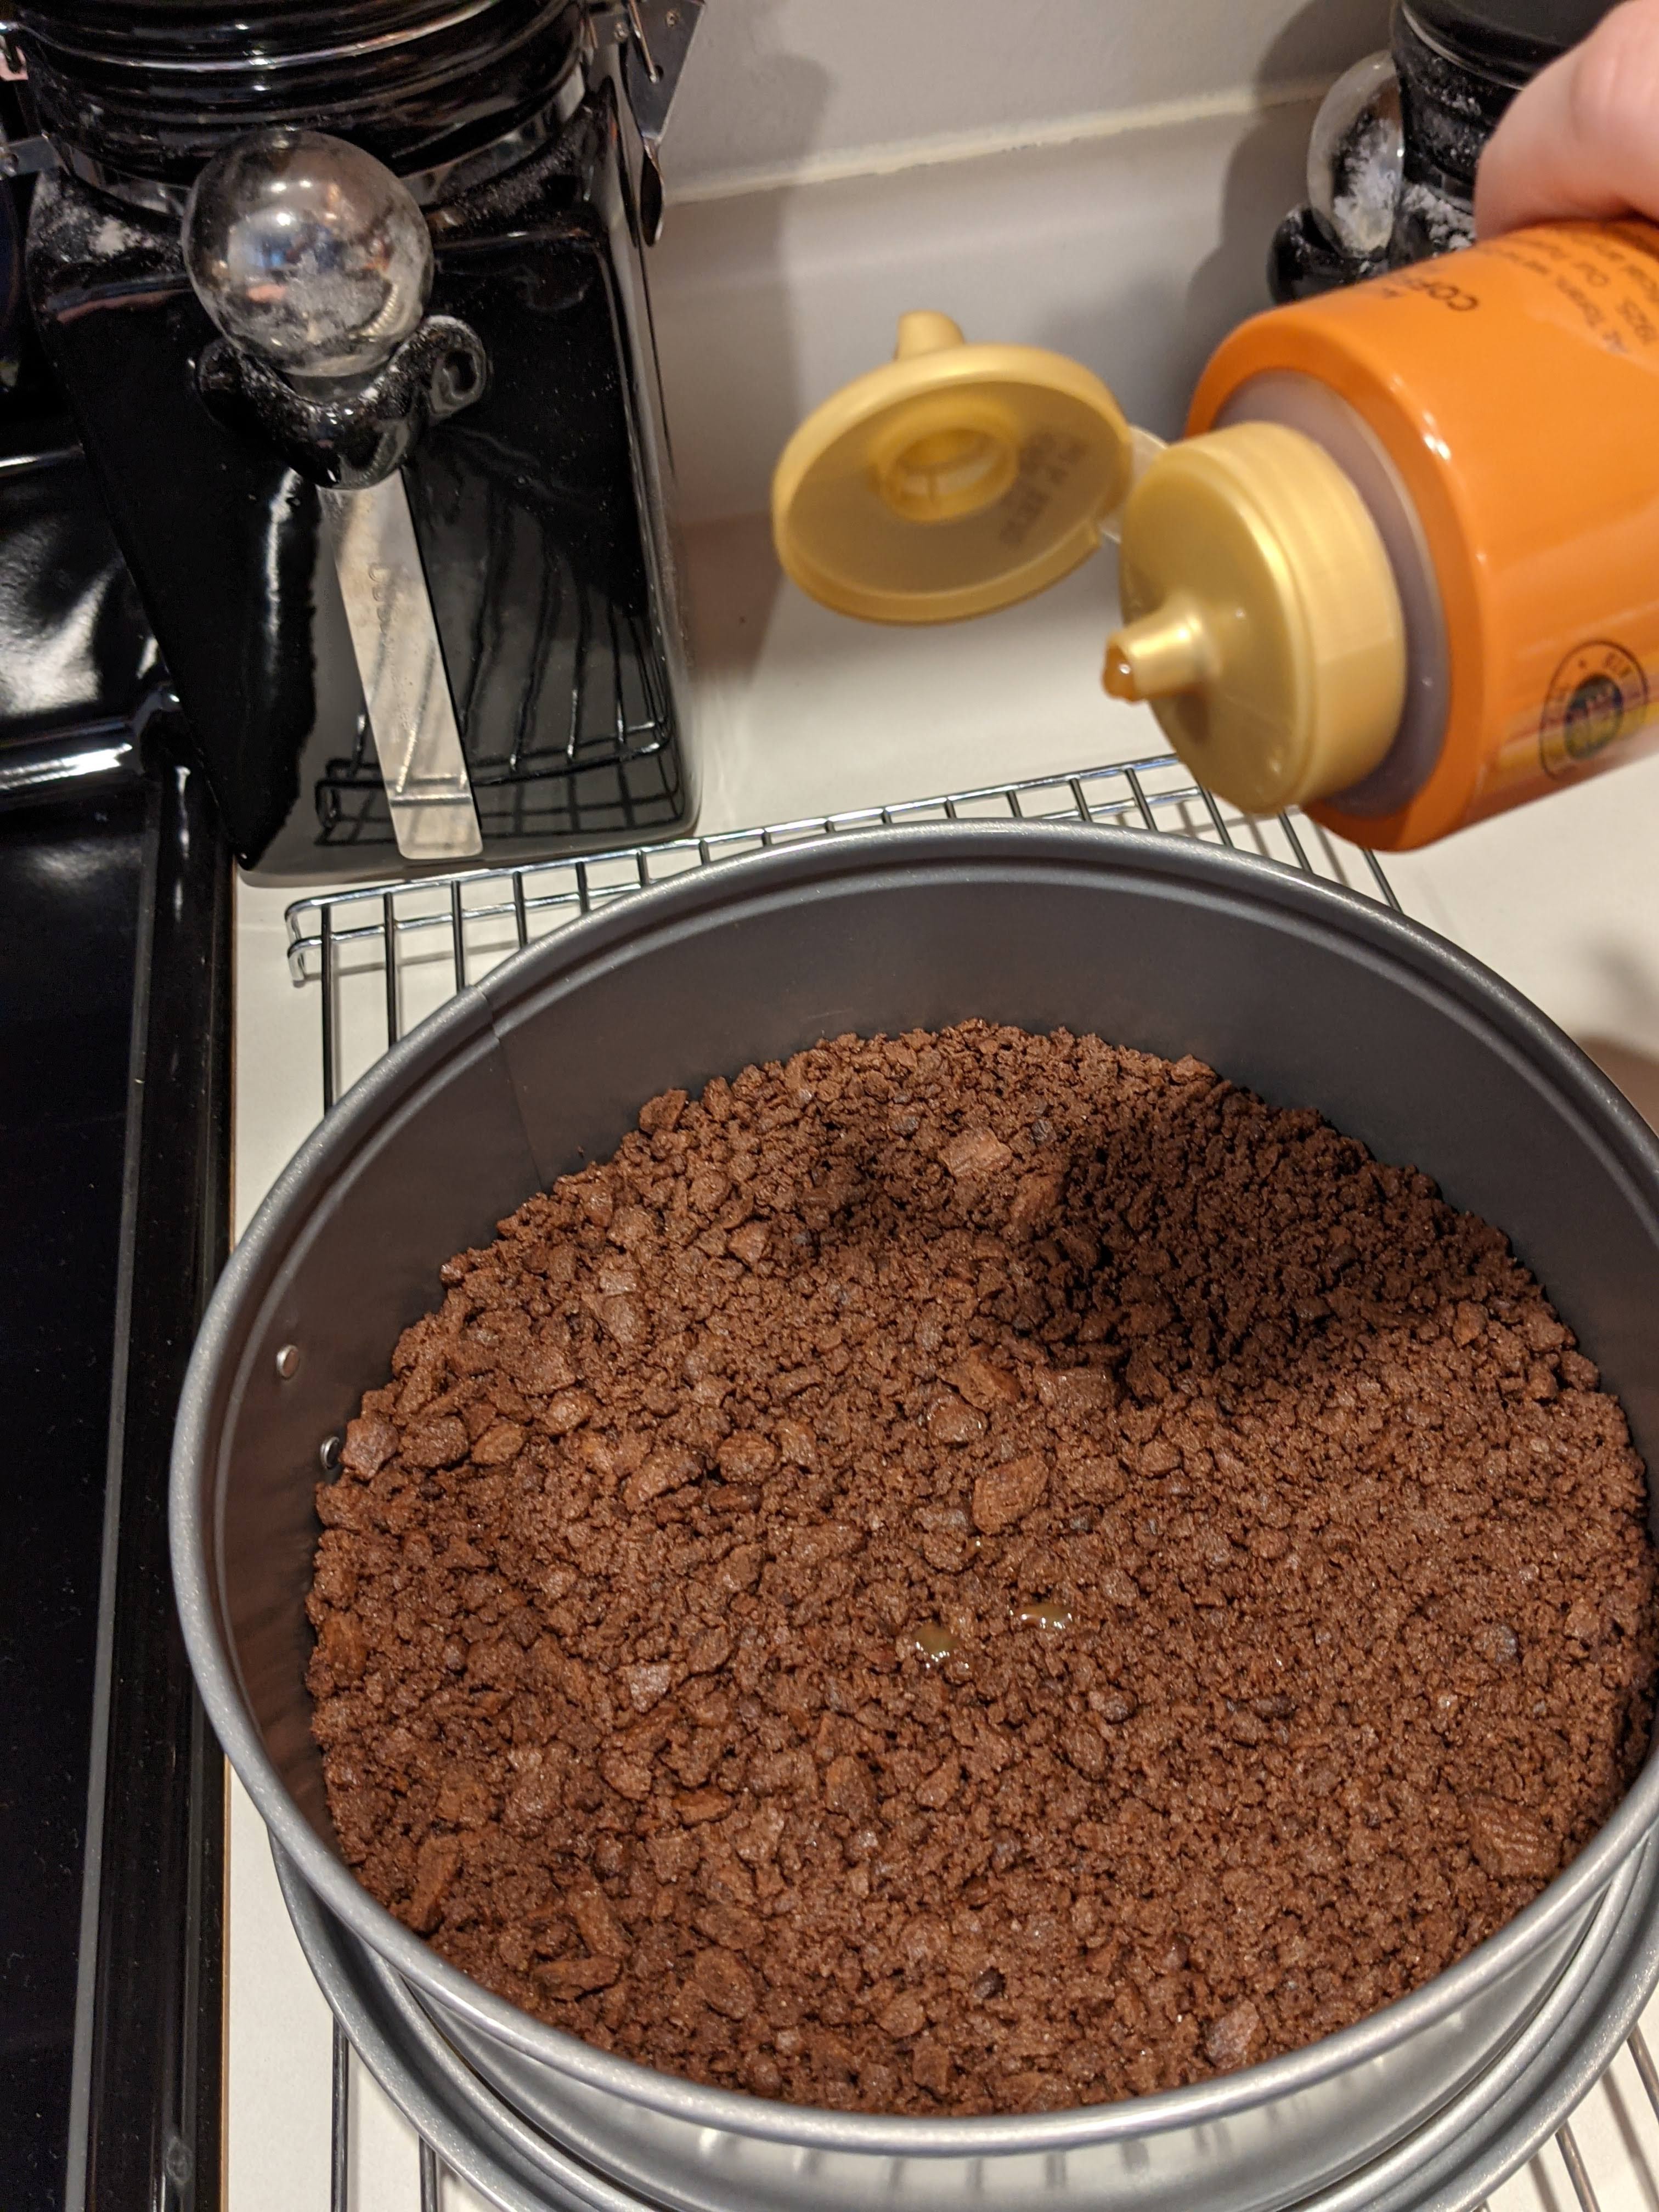
I started with the crust. I could not find chocolate graham crackers at the store but they did have chocolate teddy grahams. So I chopped those up in my fabulous ninja "food processor" and mixed them with butter and just a little sugar for the crust.
I sprayed the bottom of my springform pan with Wilton baking spray, then poured in the crust. I use the bottom of a glass to push it down so it holds together nicely.
I was supposed to bake the crust for 8 minutes, but it was more like 6 (I was pressed for time). Then I let it cool for a bit.
Next I put a layer of caramel on top of the crust. It hadn't quite cooled enough, so the caramel soaked in more than I wanted it to. But it turned out okay. I used Torani caramel because I use their syrups for punch and lemonade and I thought it would be good caramel. It was! And the bottle was really easy to use, which was nice.
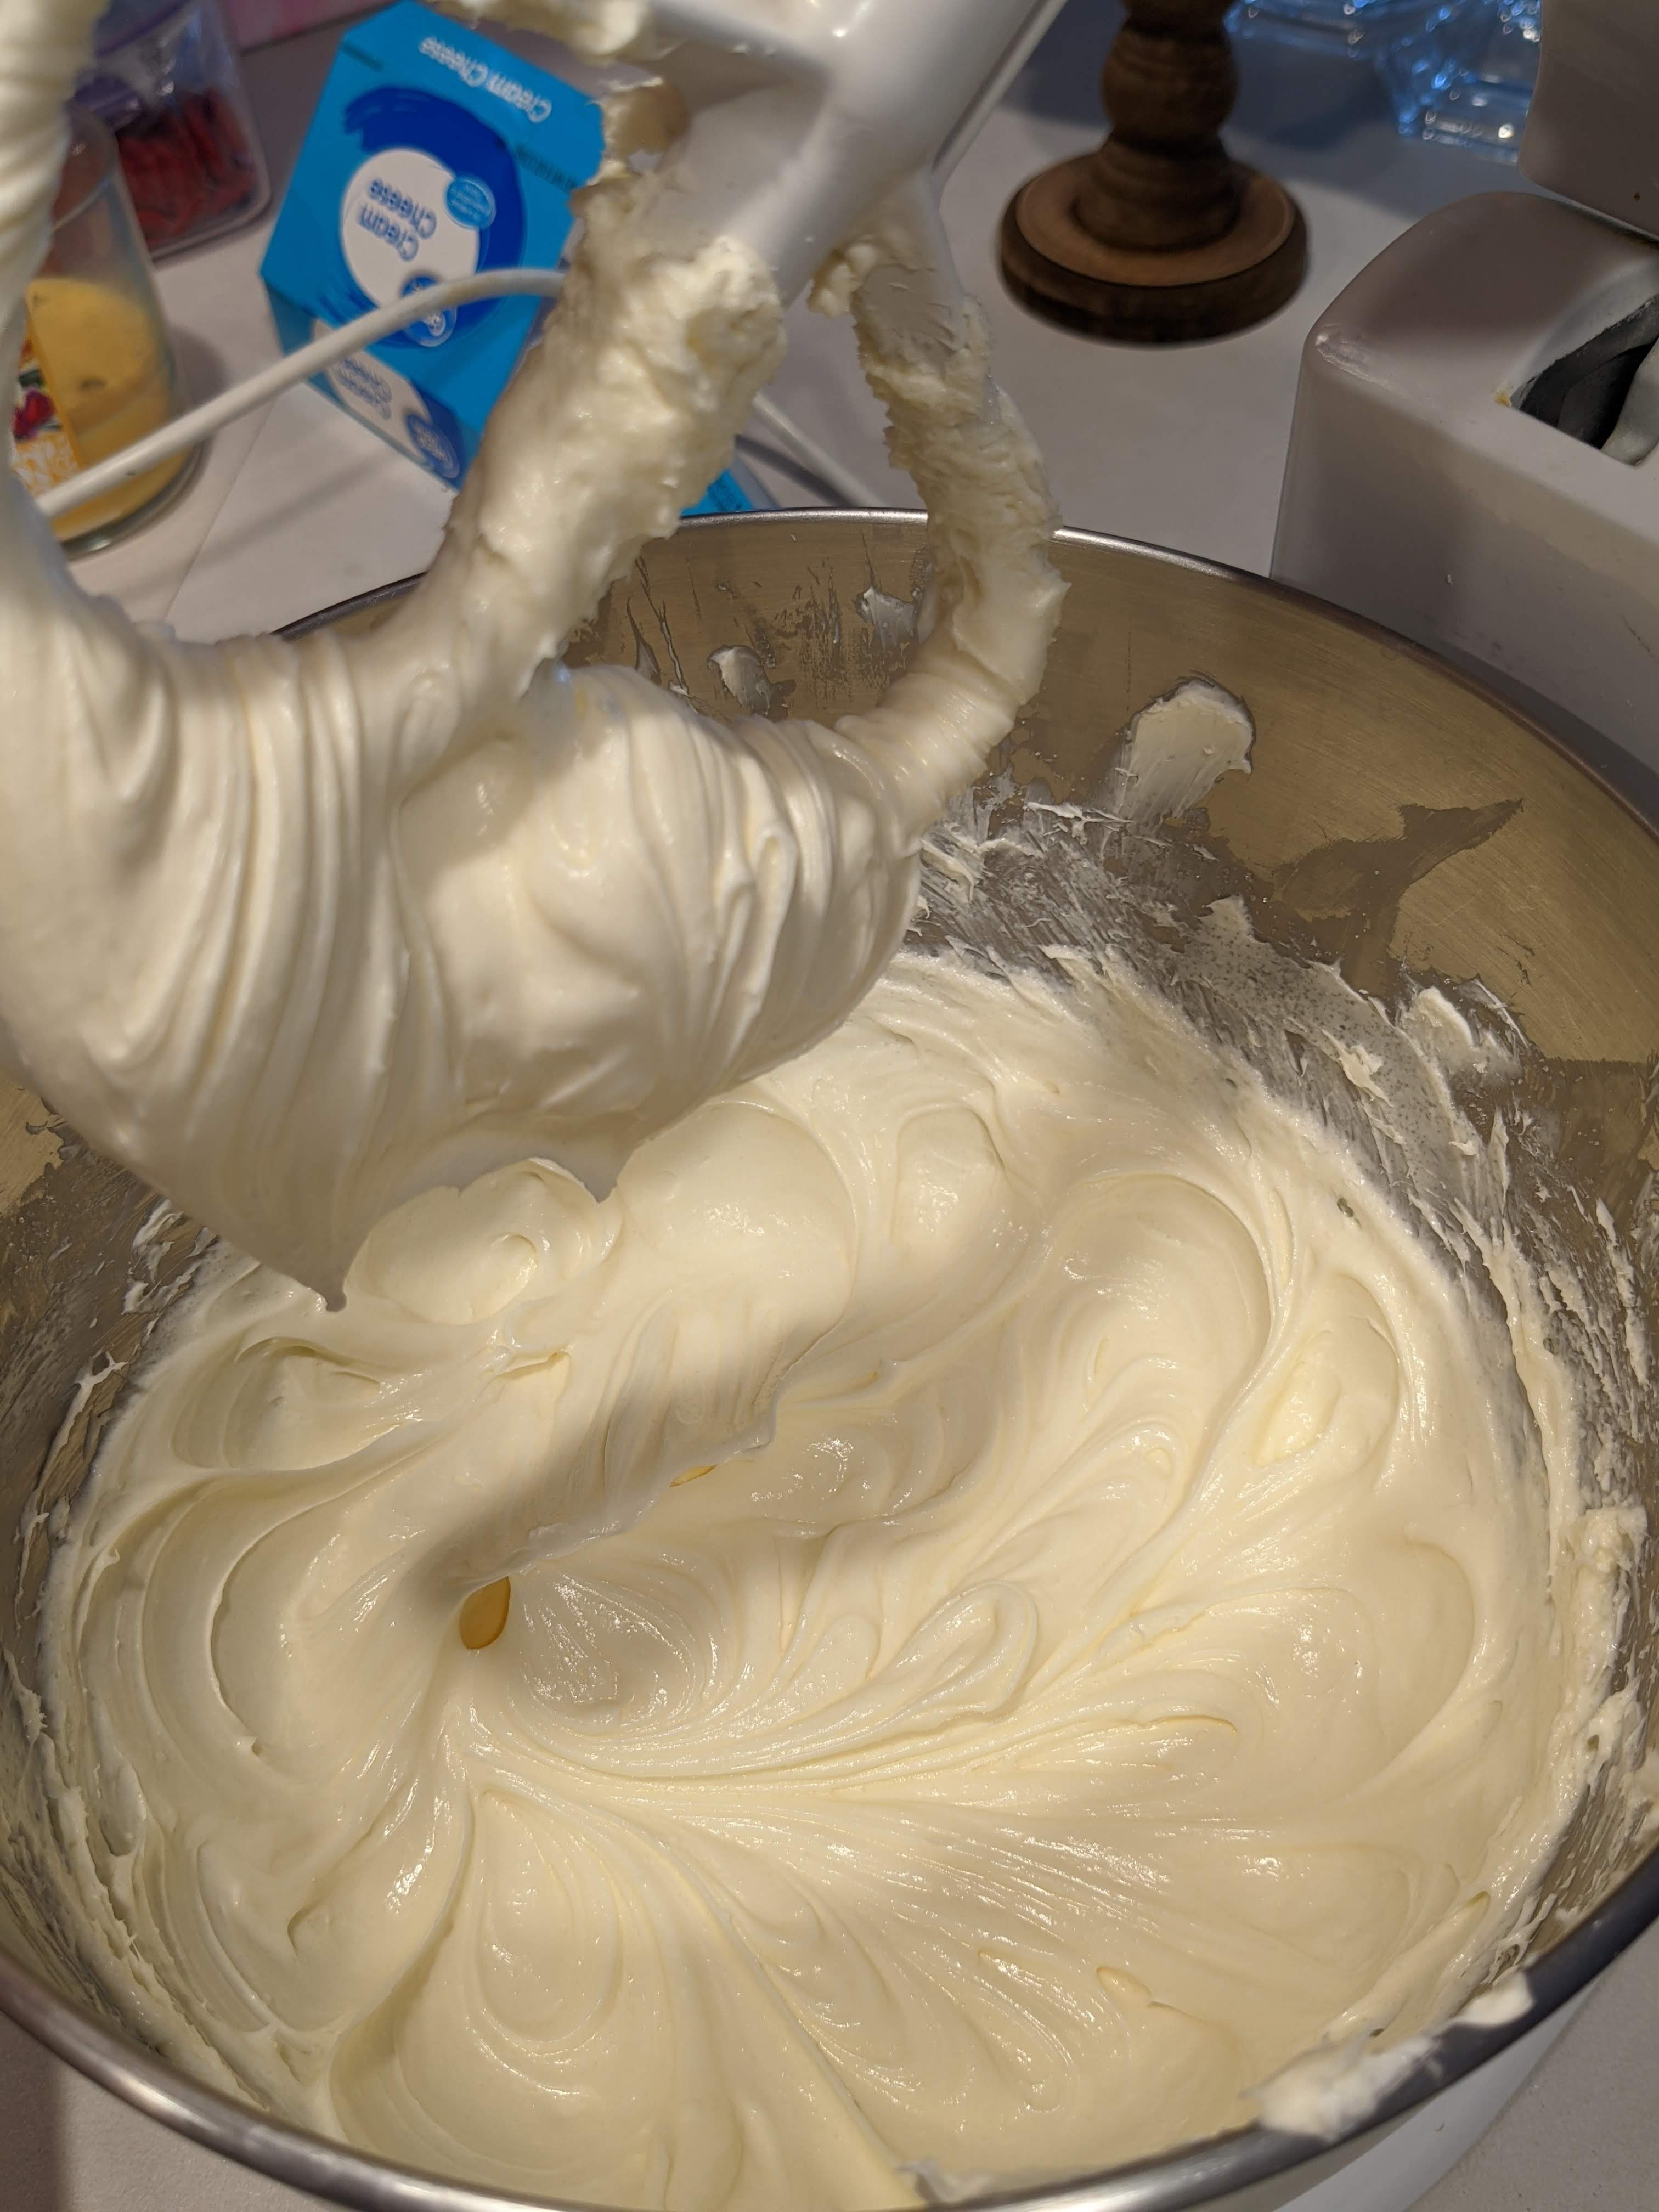
Next I made the cheesecake batter. Most cheesecake recipes have sour cream, but I really like this one from Manila Spoon which omits the sour cream. I use it as the base for all of my cheesecakes.
Make sure to whip the cream cheese and sugar until it's nice and soft and looks like frosting.
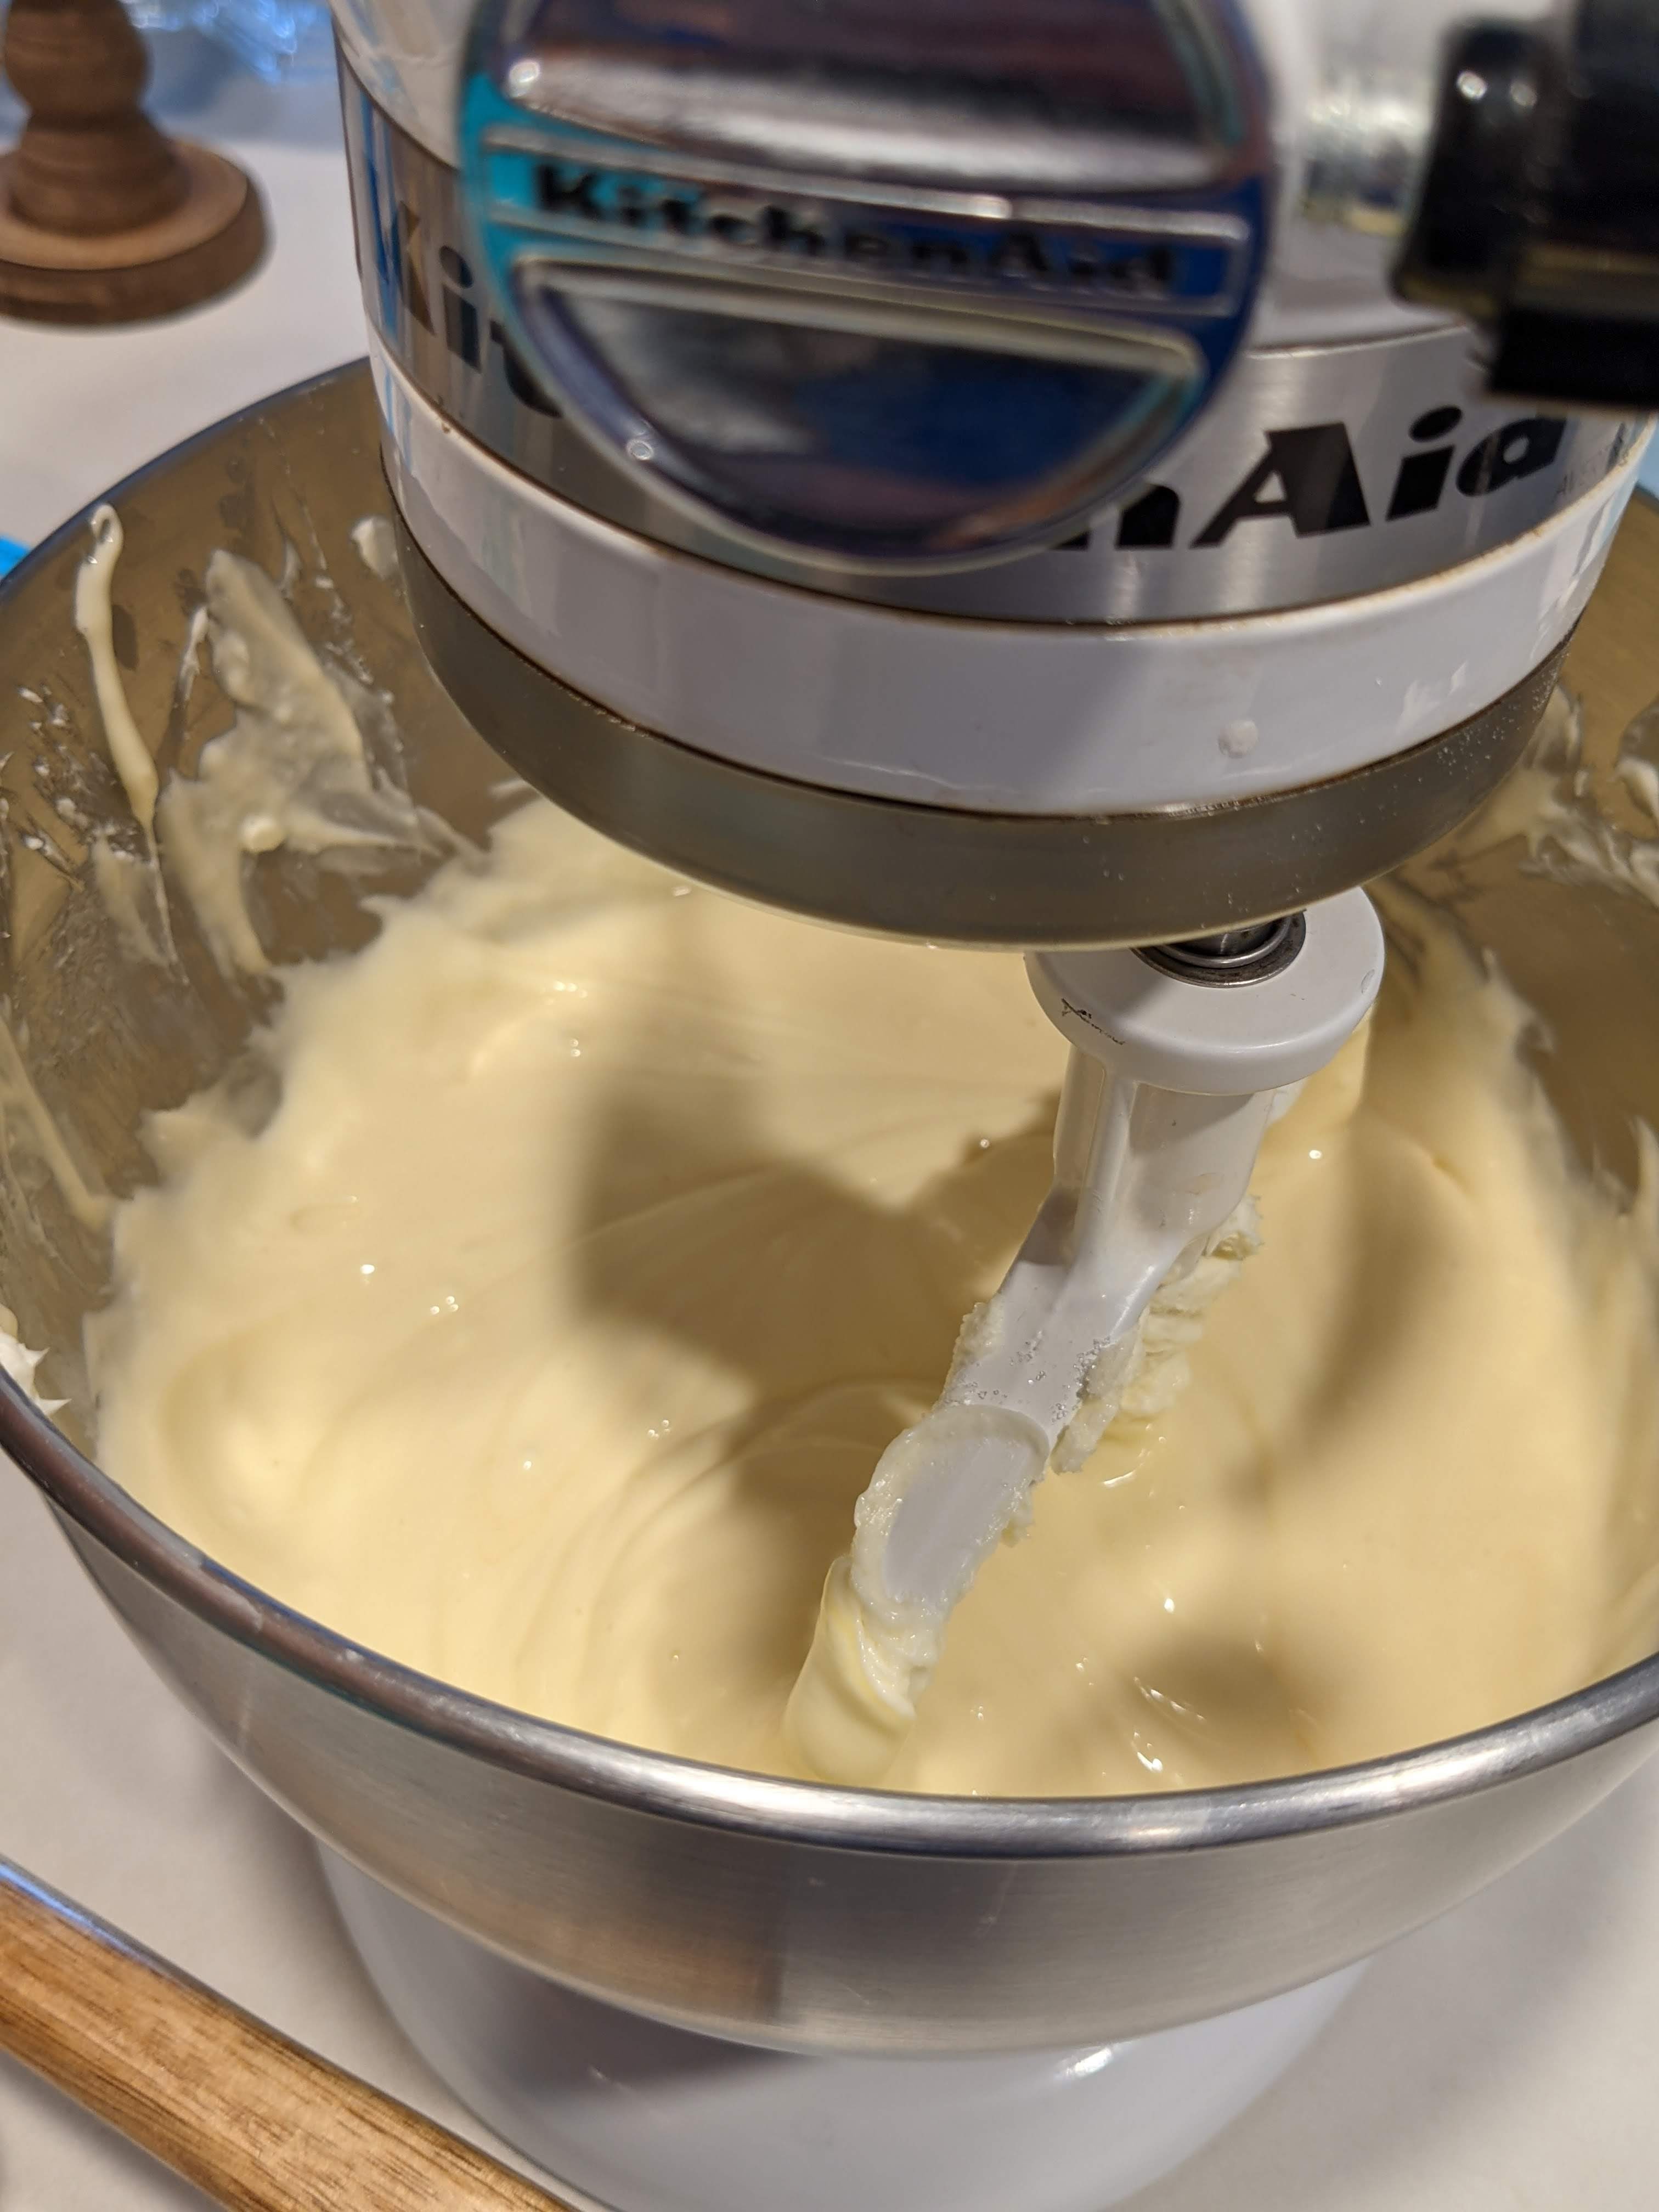
When you add the eggs, beat them in one at a time. Make sure you scrape the sides of the bowl often so you get all ingredients that hide in those hard to reach places in your mixer. It should end up looking like this.
I took the crust out of the fridge.
I poured in 2/3 of the batter, then split the last third into two bowls to mix in the caramel and the chocolate chips. I almost poured it into the melted chips right after taking them out of the microwave! There are eggs in the batter and you don't want to cook them by adding them to something hot. So I put the chocolate in the fridge for a few minutes to cool down before I mixed it in. I didn't really like the chocolate chips, next time I would use hershey's fudge sauce instead.
Then I spooned in the caramel and chocolate batter and swirled it with a knife.
Your cheesecake will jiggle even when it's done. It's just that the middle doesn't jiggle on it's own, more of the whole cake will move together. If you hit the side of the pan with a wooden spoon, it shouldn't jiggle.
Once it's done baking, I turn off the oven and crack open the door to let it cool slowly. This is to help prevent cracking. I do this for about 30-60 minutes and then take it out to cool fully. (Confession - this time it pretty much went straight into the fridge after cooling it in the oven because again, I was short on time).
Normally you would want it to chill for several hours, but once it was fully cooled, I added the decoration.
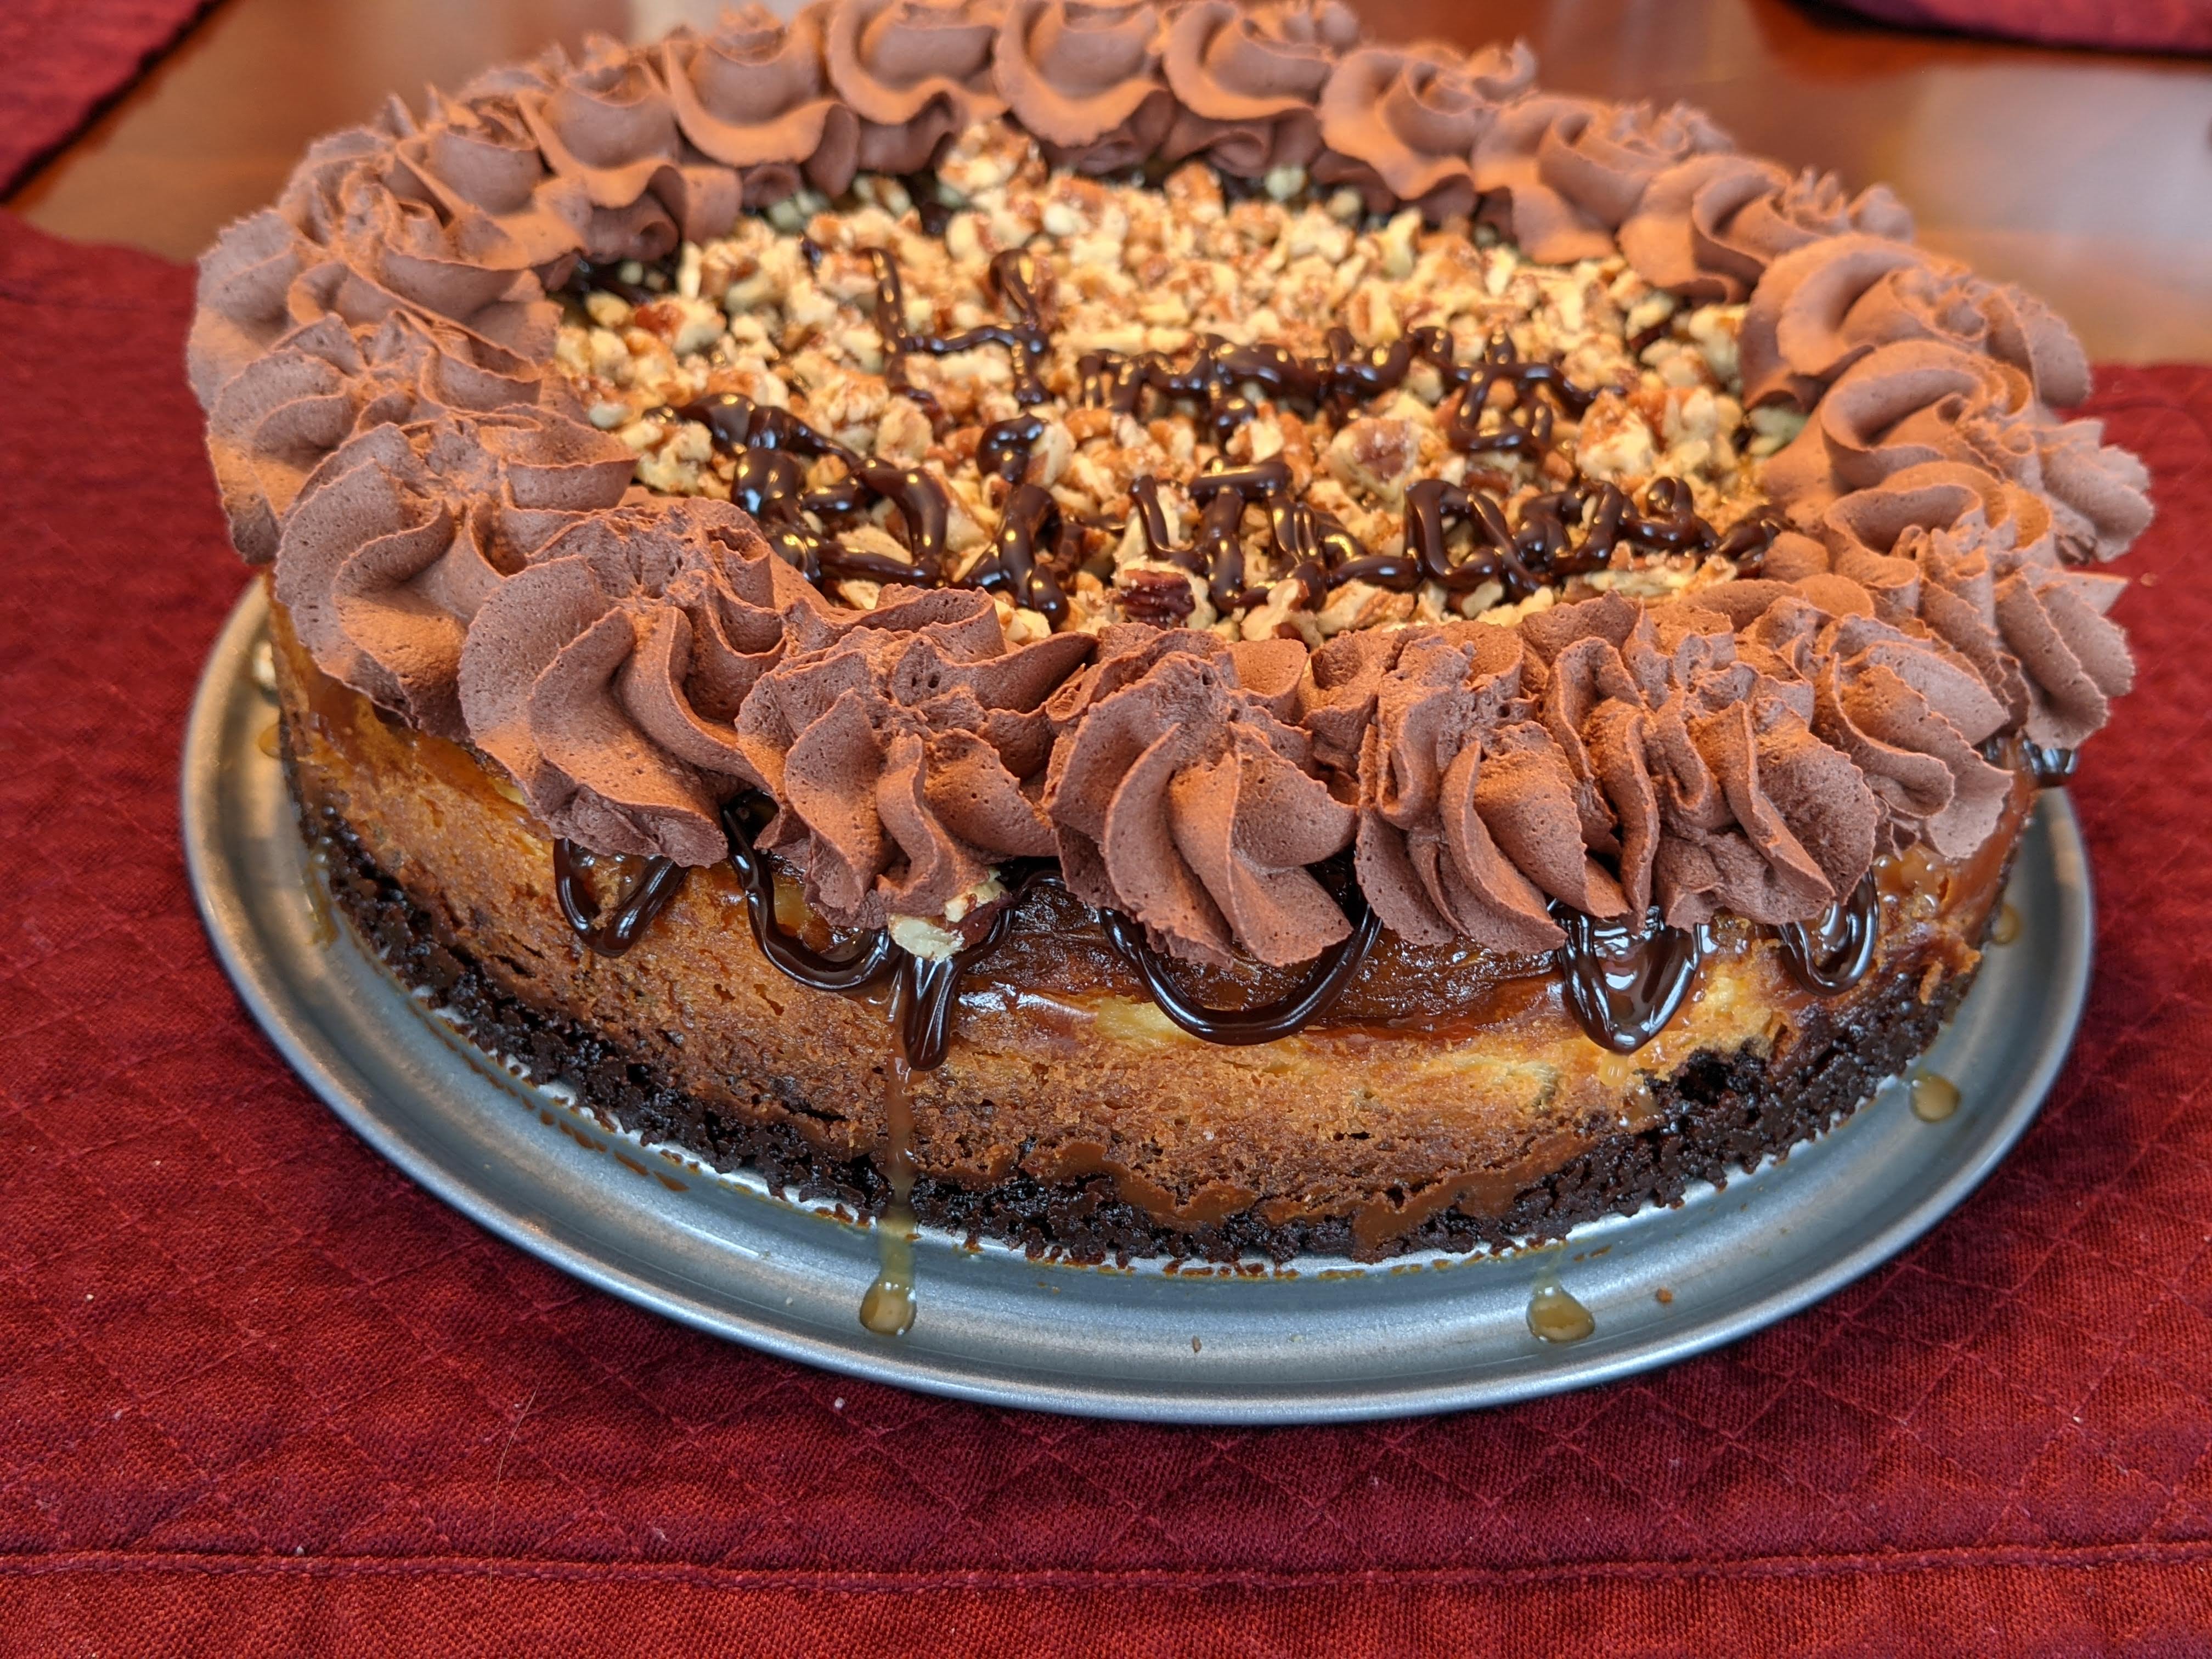
I put some Hershey's chocolate fudge in the microwave for about 20 seconds to make it pipeable. Then I spooned it into a piping bag and cut of the end. I went back and forth making chocolate lines. Next I added caramel using the Torani bottle.
Then I added chopped pecans (courtesy of the Ninja again) and piped on the chocolate whipped cream (recipe above).
Finally, I piped Happy Birthday with the leftover Hershey's fudge sauce.
It was delicious! "Better than the cheesecake factory," according to my daughter-in-law.
Here's what it looked like on the inside:
Jeff said it was a toss up between this one and the cranberry one as to which was better.
 |
| Just for comparison |
Happy Birthday to my favorite person in the world! I'm sure there will be many more cheesecake adventures to come!