I got the idea from Sweet Dreams by Tracy, found on Pinterest - a website that is becoming extremely popular and thoroughly confuses me. I thought the design looked a tad more like a dragon than a dinosaur. But then I was informed by my siblings that dragons and dinosaurs are the same thing. So as long as the cake looks cool . . . . .
(Author's Note - a reader pointed out that Sweet Dreams is no longer in existence, so here are a few links to other tutorials if you aren't happy with mine. 3d Dino Cake, 3d Dino Cake Video)
I started with some butter fudge Duncan Hines cake mix. I'm not a huge fan of the butter mixes. They just end up being a huge pain. For example, they get all big and puffy, overflow the pan and then when they cool, they sink back down again. Just a tad bit frustrating. But it worked.
I used one six-inch, one eight-inch and one 9-inch round pan to make the body of the cake. (Yay Christmas presents for making this cake possible!)
I torted the 9-inch and filled it with one of my most popular fillings - hot fudge topping with chocolate chips.
 |
| Yummy filling. You always want your dam to be the same color icing as you are going to put on the outside of the cake. (A little shout out to Pastor Dave who happened to be around and opened the fudge topping jar for me. Greasy hands you see . . .) |
 |
| Building the body |
 |
| Ready to be iced. |
 |
| Dino head. |
 |
| The neck and body. |
Building a cake like this is really hard. You get a lot of crumbs - which makes it hard to ice. Plus you have to be sort of a sculptor - carving pieces so they will fit together and look they way you want it to. But it can look great.
 |
| The tail |
 |
| I was a little nervous that the cake halves would not stay balanced on their side - but they did. |

This was a little frustrating as well. The crumbs kept mixing with the frosting and there were some very hard places to reach because of the way I built the cake. In the end, I just decided that he would be a dirty dino. More realistic that way.

Once that was done, the real fun began. I started adding the embellishments. First came the eyes and nostrils.

I used tip 12 to create the nostrils and the green part around the eyes. Then I used white frosting with tip 12 to make those lovely white eyeballs. Add a dollop of black color to the eyeballs and there you have it.
Next came the legs. Again using tip 12, I made front and back legs, along with some little green "fingers" with tip 3. I finished the look with tip 3 yellow nails.

I also added some tip 3 teeth and little yellow spikes behind the eyes and at the end of the tail.
 |
| It kind of looks like he's grinning - totally unintentional, but I like it. |
Back to tip 12 - I added some green spikes down the dino's neck, back and tail.
 |
| He's starting to look pretty awesome! |
The last part was to add the red spikes. I made these earlier in the day while the cakes were baking. I melted some red Wilton candy melts in the microwave. Then I put the resulting mess into a plastic sandwich bag and cut off the corner. Next I outlined some triangles on parchment paper and filled them in with the candy. I made 4 different sizes. Finally I let them dry for the rest of the day before putting them on the cake. (Sometimes when I use this method, I'll stick the candy in the freezer to harden. The only problem with that is that it tends to start to melt when you take it out. But if you need it to harden quickly, the freezer it is.)
 |
| You might notice that the cake is sitting on my ever faithful turntable. I love that thing. |
 |
  |

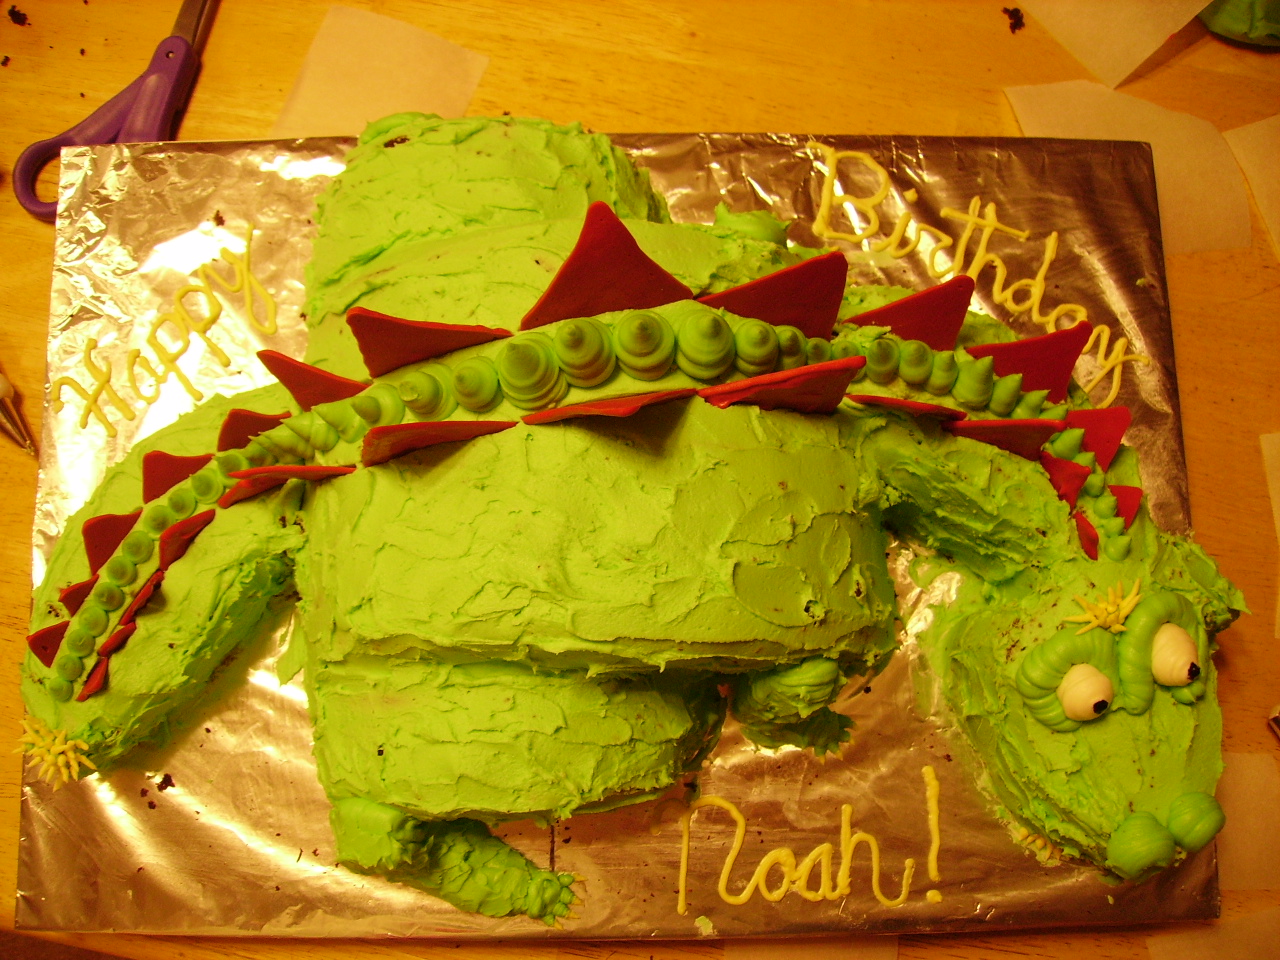
Finally I piped the words on the cake board with tip 3. And the cake was all ready to go!


2 comments:
Thanks for posting the tutorial on how to construct this. The Sweet Dreams website is no longer running, so her original tutorial is no longer available.
Rosie, glad it helped! Thanks for letting me know about Sweet Dreams. That's too bad.
Post a Comment